
Knowing how to install an electric car charger at home is essential for anyone looking for practicality and savings in the daily use of their vehicle. After all, being able to recharge your car overnight in your own garage is like "refueling" while you sleep. But in order to do this safely and efficiently, you need to follow technical standards and prepare the electrical infrastructure correctly.
In this complete guide, you'll understand step by step how to install it, what the technical requirements are, the costs involved and the essential precautions to ensure safe, fast charging that meets the requirements of your electricity network. Shall we get started?
Why install a charger at home?
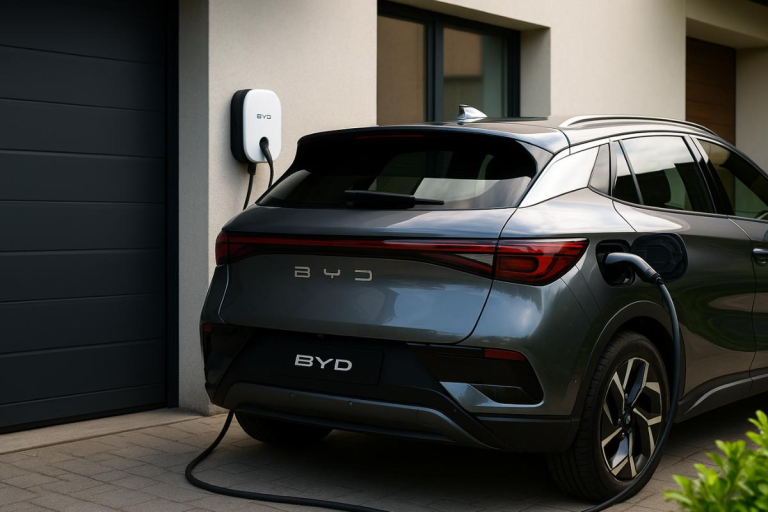
Having a home charger offers independence from public stations and daily convenience. You can avoid queues and start the day with a full battery, without having to rely on others. What's more, charging at home tends to be more economical: you can take advantage of off-peak energy tariffs or even solar energy, if you have photovoltaic panels installed, reducing costs even further. In summary, a home charger (usually of the wallbox) guarantees convenience and control the entire recharging process, making the experience of owning an electric vehicle even better.
However, in order to reap these benefits, it is essential that the installation is done correctly. Unlike simply plugging into an ordinary socket, a wallbox with 7 kW to 22 kW of power requires a adequate electrical infrastructure. This means checking the capacity of your home's network, installing protection devices and following specific technical standards.
Let's understand what you need before we start installing.
What do you need to install an electric charger at home?

1. Compatible electrical network
Check which voltage is available in your home, 127V or 220V. Chargers wallbox level 2 generally operate in 220V to provide higher power and charge faster. If your home is only 127V, you may need to adapt the installation to 220V (for example, requesting an extra phase from the utility company or using a suitable transformer).
Charging at 127V is possible with the vehicle's original portable charger (level 1), but the loading time will be much longer. The ideal is to have 220V dedicated for the wallbox, ensuring efficiency.
2. Capacity and dedicated circuit
Ask a professional if energy panel of the house can handle the additional current from the charger. A ~7.4 kW home charger can draw currents in the range of 32 A. This is equivalent to running a powerful electric shower for several hours at a time.
A exclusive circuit for the chargerwith its own circuit breaker and wiring sized for the load.
No plugging the wallbox into any socket on the appliance circuit, it must have dedicated wire and circuit breakeras a safety measure against overloads.
3. Mandatory protective devices
Modern installations require Residual current circuit breaker (DR/IDR) e Surge Protection Device (SPD) in the charger circuit. The DR (or IDR) protects against current leakage and electric shocks, while the SPD protects against overvoltages and surges (e.g. lightning) by diverting excess voltage to earth.
These items are required by technical standards (present in new constructions, but in older homes they may need to be installed). Also make sure you have properly sized circuit breakers.
In short, the charger protection frame must include an exclusive circuit breaker, DR and SPD, guaranteeing safety against shocks, shorts and surges.
4. Technical standards and electrical design
Installation must follow the Brazilian Standards (NBR) applicable. The main ones are NBR 5410 (low voltage electrical installations) and the NBR 17019:2022which deals specifically with the requirements for electric vehicle power supply infrastructure in fixed installations. In addition, ABNT has a standard suitable for residential wallboxes with safety guidelines (often referred to as "ABNT 1719" in articles). In practice, this means: correct sizing of cables, protections, ventilation, proper positioning and respect for the charger and vehicle manufacturer's recommendations.
Draw up a small electrical project or single-line diagram with the help of an electrical engineer or accredited technician, preferably with a Technical Responsibility Certificate (ART) from that professional. This project will guide the modifications to be made and ensure that everything is in compliance.
5. Space and location
Choose where to attach the charger with convenience and safety in mind. The wallbox should be located close to the car parking space, preferably at less than 5 meters away from the charging point in the vehicle. This avoids improvised extensions and voltage drops. Make sure the location is protected from sun and rain (or use a charger with a degree of protection suitable for outdoors). Covered garages are ideal; if outdoors, consider installing a cover or at least protecting the equipment.
Also ensure that children or pets do not have easy access to cables and connections during recharging, preventing accidents. Small details such as installation height and safety locks make a difference.
Once you've met these requirements, you're ready to start the actual installation. Next, check out the recommended step-by-step to install the charger in your home.
How to install an electric car charger at home (Step by Step)

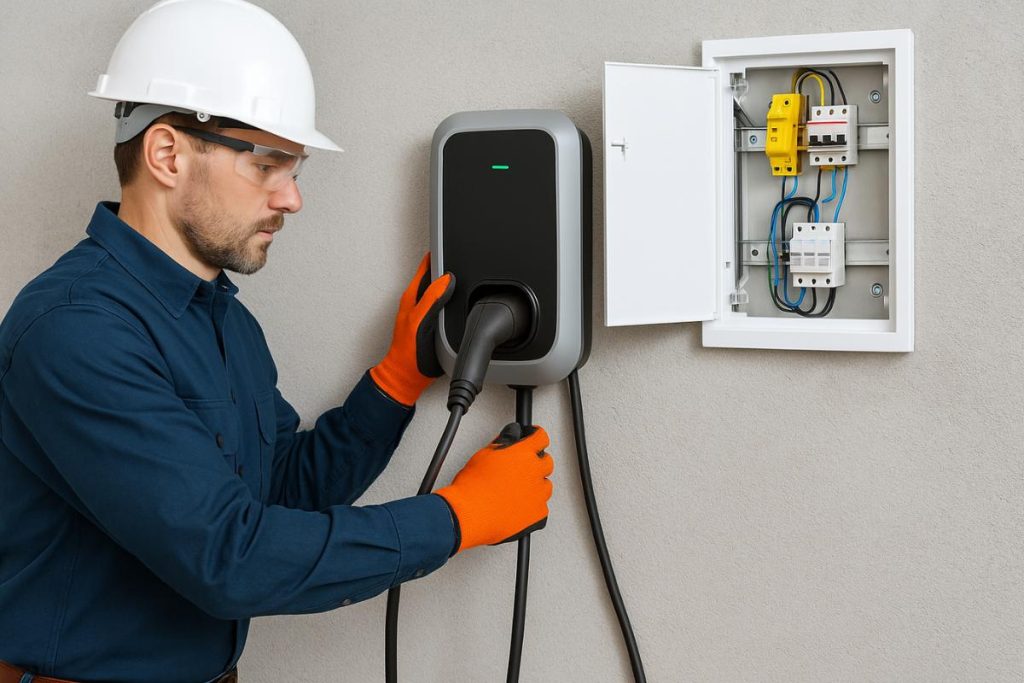
Step 1: Professional assessment of the electrical infrastructure
The first step is hire a qualified electrician or electrical engineer. Even if you have basic knowledge, don't give up on an experienced vehicle installation professional.
It will check the property's power supplythe capacity of the input standard, the switchboard and circuits. This initial visit is usually free or low-cost, and will provide the list of adjustments needed to support the wallbox in accordance with technical standards.
The professional will measure the available load, checking whether the house can handle the extra demand or whether an upgrade is needed (for example, changing the main circuit breaker, increasing the amperage of the meter, etc.). Don't burn the stage: This prior analysis ensures that the installation complies with NBR 5410/NBR 17019 and avoids damage to the vehicle or the home network due to overloading.
Step 2: Electrical fittings and materials
With the expert's guidance, make the necessary adjustments. This usually includes install a new dedicated circuit in the light box for the charger only. This circuit will have: electrical cable of appropriate gauge (defined according to the power of the charger and distance, thicker cables for long distances or high currents), a exclusive circuit breaker compatible with the wallbox chain and the DR and SPD devices in the protective frame.
If your network is 127V and the charger requires 220V, it is at this stage that the electrician will make the two-phase connection or install a transformer/autotapher, as appropriate. In some scenarios, it may be necessary to reinforcing the service entrance (for example, going from 60A to 100A, or from single-phase to two-phase/three-phase) - this must be done with the approval of the local power utility. With all the components in hand (cables, conduits, circuit breakers, DR, SPD, panels, etc.), we proceed to the physical execution.
Step 3: Physical installation of the charger (wallbox)
Once you've chosen a location in the garage or parking lot, attach the charger to the wall following the manufacturer's instructions (usually at a comfortable height for handling the cable and out of reach of small children). The electrician will then wiring from the switchboard to the wallbox installation point. The cables must run through suitable conduits or ducts, avoiding the risk of mechanical damage. In the switchboard, connect the new circuit to the correct terminals (phase, neutral, earth) and install the circuit breaker, DR and SPD according to the diagram. Make sure the house is properly earthed and that the charger's earth is correctly connected, this is a critical point for safety. After the electrical part, the technician connects the output cable to the charger (some models come with a cable attached, others require connecting the type 2 cable separately). Tip: ensure that the length of the charger cable comfortably reaches the car socket without the need for extensions. A well-done installation leaves everything organized: the protection panel identified, the cables dimensioned and the equipment firmly fixed to the wall.
Step 4: Testing and configuration
With everything connected, it's time to test the system. Before connecting to the vehicle, the electrician checks with instruments that the voltage is correct at the charger connector (e.g. ~220V between phases, ~127V phase-to-ground, as appropriate) and that the grounding is effective. Next, plug the charger into the electric car for a practical test. Check that recharging starts normally, that there is no excessive heating in the cables or circuit breaker and that no circuit breaker is tripping.
Also test the protections: some DRs have a test button, press it to see if it disarms correctly, ensuring that it is functional against shocks. Check on the car dashboard or the wallbox itself that the load current is stable. Monitor the first few minutes is important. Everything okay? Good!
Finally, the professional can help with charger configurationif it has settings (some wallboxes allow you to adjust the maximum current, schedule charging times, connect to Wi-Fi for monitoring via app, etc.) Leave these functions calibrated to your needs.
Step 5: Conscientious use and maintenance
With the charger installed and tested, simply use it on a daily basis following the manufacturer's instructions. First connect the cable to the car, then activate the charger (some models turn it on automatically). When finished, stop charging using the correct procedure and disconnect. Never leave cables lying around on the floor to prevent someone from tripping or driving over it. Keep the equipment clean and dry; if it is external, check the seals periodically. Schedule regular check-ups (for example, an annual inspection of the electrical panel) to tighten connections, clean panels and make sure everything is still in order. This prevents problems and extends the life of both the charger and the electrical system.
By following these steps, the installation of your home charger will be completed safely and reliably. But what if you live in an apartment or condominium? Here's what changes in these cases.
Installing a charger in a condominium: extra precautions
If you live in a building or condominium, installing a charger in your parking space involves more planning and agreements. Many Brazilian condominiums are not yet prepared for the extra demand for electric vehicles. First of all, consult the liquidator and internal rules. In general, you will need present a professional electrical project for approval at the meeting, as the installation is considered an improvement that affects the shared infrastructure.
Load study: Condominiums can demand a technical study of electrical capacity. An engineer will assess the load available in the building and size how many chargers can be installed without compromising the system. This study and electrical project for condominiums has a high cost, around R$15 thousand to R$20 thousandThis is usually divided between the condominium owners concerned or paid for by the condominium.
In São Paulo, for example, specific regulations are being discussed that will define safety parameters (such as automatic sprinklers in new garages and smoke sensors) and guarantee by law the right of residents to install their charger in their own parking space, provided they follow the technical standards and bear the costs. Be aware of local laws and always demand that the installation follows the ABNT standardsnot only for safety, but also to be covered by insurance and legislation.
Collective vs. individual infrastructure: One decision to be made in a condominium is whether each resident installs their own wallbox individually or if the building implements a collective infrastructure. Collective solutions can include cargo management systemsin which the chargers "talk" to each other and balance consumption so as not to overload the network.
These systems are more expensive and complex, but they prevent a charging car from tripping the building's main circuit breaker. Individual installation (if allowed) means that each resident pulls a dedicated circuit from their light board (or from the general board with separate metering) to their parking space. In both cases, it may be necessary to increase the building's energy capacity (upgrade of the transformer or power input) if many chargers are planned. All this must be included in the project.
Condominium costs: In addition to the initial study (project), count on the installation costs per meter of cables and conduitsThis is similar to homes. The general rule applies here too: about R$100 to R$120 per meter distance from the panel to the parking space. In other words, if your parking space is 30 meters from the main electrical panel, expect around R$3,000 to R$3,600 in materials and labor, not to mention equipment. We recommend installing individual metering of the charger's consumption (a separate meter or charging system) so that each resident pays for their own energy use, avoiding conflicts on the condominium's electricity bill.
Tip: Some condominiums are choosing to offer subscription services chargers. Specialized companies install the chargers and residents pay a monthly fee for the service. For example, there are wallbox rental solutions starting at R$299/month in Brazil. This can be an interesting alternative if the condominium doesn't want to incur a high investment right away. In any case, always involve qualified professionals and formal approval. Installation in a condominium, when done without planning, can lead to serious risks to the building and even legal conflicts. That's why you should proceed with transparency and a technical basis together with the other residents.
How much does it cost to install an electric car charger at home?
A common question is how much you will spend to have your own home charging point. The costs involve two main components: the equipment (charger) and the electrical installation.
- Price of charger (wallbox): Many electric cars already come with a wallbox as a gift or with a portable charger included. If this isn't the case and you need to buy the equipment, prices for home chargers vary on average from R$3.500 to R$8.000 in Brazil, depending on the brand and power.
7 kW (single-phase) models tend to be in the lower range, while 22 kW (three-phase) wallboxes or those with smart are in the upper range. Choose a charger from a reliable manufacturer that is compatible with your vehicle (type 2 connector is the standard for 98% EVs in Brazil).
Note If you choose to use only portable charger that comes with the car (which plugs into a standard socket), there is no cost for extra equipment, but bear in mind that this method is slower and may require adaptations to the socket to withstand continuous use. - Labor and installation materials: Here the cost depends a lot on the distance between the electrical panel and the installation site the charger, and the necessary adaptations. Professionals in the sector indicate an approximate value of R$100 to R$120 per meter installed, including cables, conduits, circuit breakers/DR/DPS and service.
For example, if the charger is in the garage next to the frame area, the short distance (say 5 meters) could cost around R$500 to R$600. If it's on the other side of the house, 20 meters, something around R$2,000 to R$2,400.
In addition, if it is necessary to increase the load on the house (change the energy standard, transformer, etc.), there will be extra costs with the utility company and electrician, which vary from case to case.
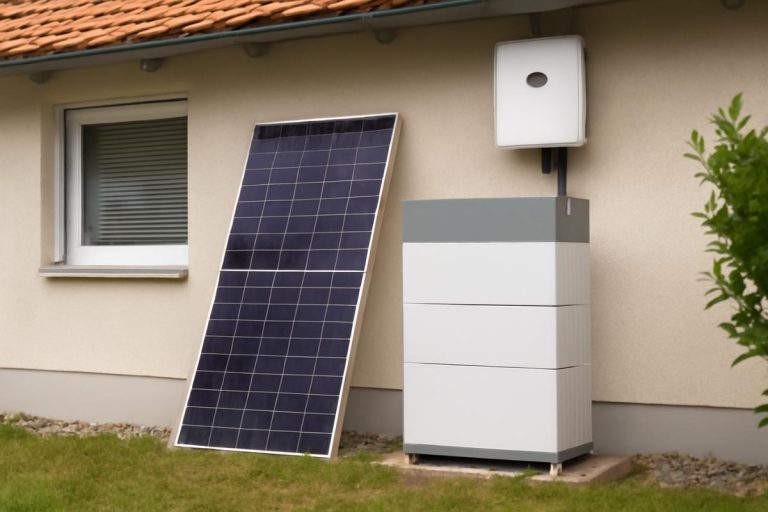
Tip: ask for a detailed quote before you close, and always ask for qualified professionals. Saving money by using cheap, unskilled labor can be costly later on. - Optional extra costs: Depending on the complexity, there may be costs for licenses or ART of the engineer (an ART usually costs a few hundred reais). In single-family homes, usually no license from the municipality or utility company is required to install the chargerUnless you increase the load beyond the contracted amount, then you have to apply to the energy company for an increase in load. So far, installing a wallbox in your home is similar to adding a large domestic appliance, from a legal point of view. does not require special authorization from public bodies. In condominiums, on the other hand, as we've seen, there may be assemblies and paid studies. Finally, consider whether it's worth investing in improvements such as load balance (load balancer) or photovoltaic back-up system - for example, combining solar energy with the charger to charge your car with electricity generated on your roof. This is a sustainability trend, although it implies additional investment in solar panels and possibly storage batteries.
In a nutshell, the typical residential installation (excluding the device) is usually in the region of a few thousand reais, depending on the situation. It may seem like a significant investment, but remember that refueling an electric car is much cheaper than a combustion car, the monthly savings on fuel can make up for this cost in a short time. It also adds value to the property and gives you the autonomy to run on your own energy.
Safety tips and using a home charger
Once the charger is installed, it is important to follow a few good practices to ensure continuous security:
- Follow the manufacturer's instructions: It sounds obvious, but read the manual for both your electric car and the charger. It contains details such as the maximum current supported, whether the equipment needs a firmware update, temperature alerts, etc. Never exceed the specified limits.
- Never use adapters or "workarounds": Don't connect the charger to T's, extension cords or makeshift sockets. The entire system must be fixed and dedicated. Also avoid "adapting" connectors on your own, use only original or certified cables and plugs for electric vehicles. Improvisation can cause serious risk of fire or electric shock
- Pay attention to ventilation: High-powered chargers can generate heat. Install the wallbox in a ventilated area. If it has a coiled cable, unwind it completely during use to prevent the coiled cable from heating up. Some models have internal fans, so keep the air vents unobstructed.
- Protect against water and weather: Even equipment with IP65 protection deserves care. Avoid having the charger in direct rain or intense sunlight all day, as this reduces its useful life. If installed outdoors, consider protective covers or boxes. Never touch the connectors with wet hands and, if you notice moisture on any connection, stop using it until it dries out and is checked.
- De-energize for any maintenance: If you need to open the protection panel or tamper with the wiring for any reason, turn off the main circuit breaker before. This also applies if you're going to replace the charger in the future, always cut the power and test the absence of voltage before handling the cables.
- Keep an eye on the first cycles: During the first few days of use, monitor the system's behavior. Check if no abnormal heating on the plug that connects to the car (a slight warming is normal, but very hot indicates a problem), listen for strange noises from the circuit breaker or charger, and observe whether the full charge occurs in the expected time. If there are any anomalies, call the installer to check.
- Updates and connectivity: If your charger is a smart (connected to the internet or app), keep your firmware up to date for security fixes and improvements. Use features such as scheduling charging for reduced-rate times, if available, to optimize your spending.
With these precautions, the experience of having a car charger at home will be safe, quiet and highly convenient. You'll leave home every day with a full tank of electricity, making the most of the benefits of your electric vehicle.
Install your electric charger with an energy leader

Installing an electric car charger at home is a investment in autonomy and convenience. By following the steps in this guide, electrical planning, technical adjustments, professional installation and safety precautions, you will have a reliable and compliant charging system, protecting your property and your family. Remember: although it's not an extremely complex process, it does involve high voltage and current, so having experts is essential for a safe result.
Now that you know how to install your residential wallbox, how about taking the next step? Ready to charge your streetcar safely and quickly from the comfort of your own home? Get to know BYD Chargersstate-of-the-art equipment, with a compact design and safety certification, e count on our team for perfect installation. Turn your garage into a private charging station and join the future of electric mobility!
FAQ: Frequently asked questions about home charger installation
How much does it cost to install an electric car charger at home?
The cost varies depending on the scenario. O wallbox itself can cost between R$3.500 and R$8.000 (in case you need to buy it). The electrical installation depends on the distance and adjustments required, revolving around R$100 to R$120 per meter of cables and infrastructure. In an average house, the complete installation (materials + labor) is often in the range of R$1,000 to R$3,000, but it can be less if the board is very close to the vacancy, or more if there is a need for major electrical upgrades.
For condominiums, technical design costs must also be included (R$15,000 to R$20,000, usually prorated). In short, each case is different - the ideal is to ask for a professional quote to get an accurate figure.
Do you need a permit or license to install a home charger?
In private homes, usually no need to obtain a license from the town hall or utility company to install a car charger at home. All you need to do is install it internally and follow the technical standards. You only need to involve the utility company if you need to increase the load (amperage) of your power supply. In condominiumsyou need approval by the liquidator/assembly. Many buildings require a report or project signed by an engineer, guaranteeing that the installation meets the standards and does not pose risks to the building.
Also be aware of local regulations: states like São Paulo are developing specific rules for installations in condominium garages, so find out if there are any extra requirements in your city. In short, in your own home it's much simpler (no formal licenses), in a condominium you need to follow the internal and technical procedures.
Can I charge my electric car from a standard socket at home or do I need a wallbox?
Yes, you can charge it from a standard socket (110V or 220V) using the portable charger that usually comes with the vehicle. All electric cars are compatible with standard household socket charging. However, this is considered a "level 1" charge, with lower power, taking much longer to fill the battery.
For example, a 127V 16A socket charges about 10 km of range per hour, while a 7 kW wallbox adds ~35 km per hour or more, depending on the vehicle.
What's more, most common electrical installations are not designed to withstand long hours of heavy load and continuous. Therefore, if you are going to use the socket, make sure that the wiring and circuit breaker on that circuit are rated for the current of the portable charger (usually 10-12 A for many hours). Use a dedicated socket outlet, preferably a new one, with proper grounding. Avoid extension cords and make sure the plug doesn't get hot. For safer, everyday use, it's best to install a wallbox with a dedicated circuit, as it offers faster recharging and enhanced protection.
What voltage and power do I need at home to install a charger?
O ideally 220V available in the garage for a residential charger (level 2) - many wallboxes use 220V single-phase or two-phase. In places where there is only 127V, you can charge on 127V with portable equipment or even install a specific wallbox, but the power will be limited (~3.7 kW). The recommended minimum is that you have 7 kW availability This usually requires 220V and a 32 A circuit breaker just for the charger.
In terms of contracted electrical powerIn order to accommodate the charger along with other consumption (smaller homes usually come with a standard 6 to 8 kW, you may need to expand), it is advisable to have at least 10 kW of demand in the home.
In a nutshell: 220V makes it much easier and allows ~2x faster charging, but even with 127V it is possible to charge, it will just be slower. Check with your electrician the capacity of your system and, if necessary, ask the distributor for a phase/voltage upgrade to suit the charger.
What standards and certifications should I observe when installing?
The main Brazilian technical standards for this type of installation are NBR 5410which governs low-voltage electrical installations in general, and the NBR 17019:2022specific to electric vehicle charging infrastructure. The standard ABNT NBR IEC 61851which deals with the requirements for charging equipment for electric vehicles (this can be referenced in charger manuals).
In addition to the rules, strictly follow the charger and vehicle manufacturer's instructionsFor example, a manufacturer may specify that his wallbox requires X circuit breaker and Y gauge cable. Use only certified components (cables with an Inmetro seal, standardized protection devices). Finally, if you are hiring a third party to install, demand accredited professionals and preferably an electrical engineer's design/ART. By complying with all the standards and recommendations, you can guarantee the safety of the installation and avoid problems with insurance companies or vehicle warranties.